My definition: Heaven in your mouth, addicting, never sticks around for more than a day.


This recipe is so ridiculously easy...and SO GOOD!
It's definitely something I would recommend to beginner bakers....as well as anyone looking for an easy dessert to whip up!
My family absolutely loves making this in Summer, and we even grow rhubarb (as well as a multitude of berries) on our farm. Having fresh fruit available all summer is so wonderful...and we often mix up what kind of fruit we use in this tasty dessert as well.


Nice and easy. Stir your fruit together in the pan, and then sprinkle with cinnamon and sugar.
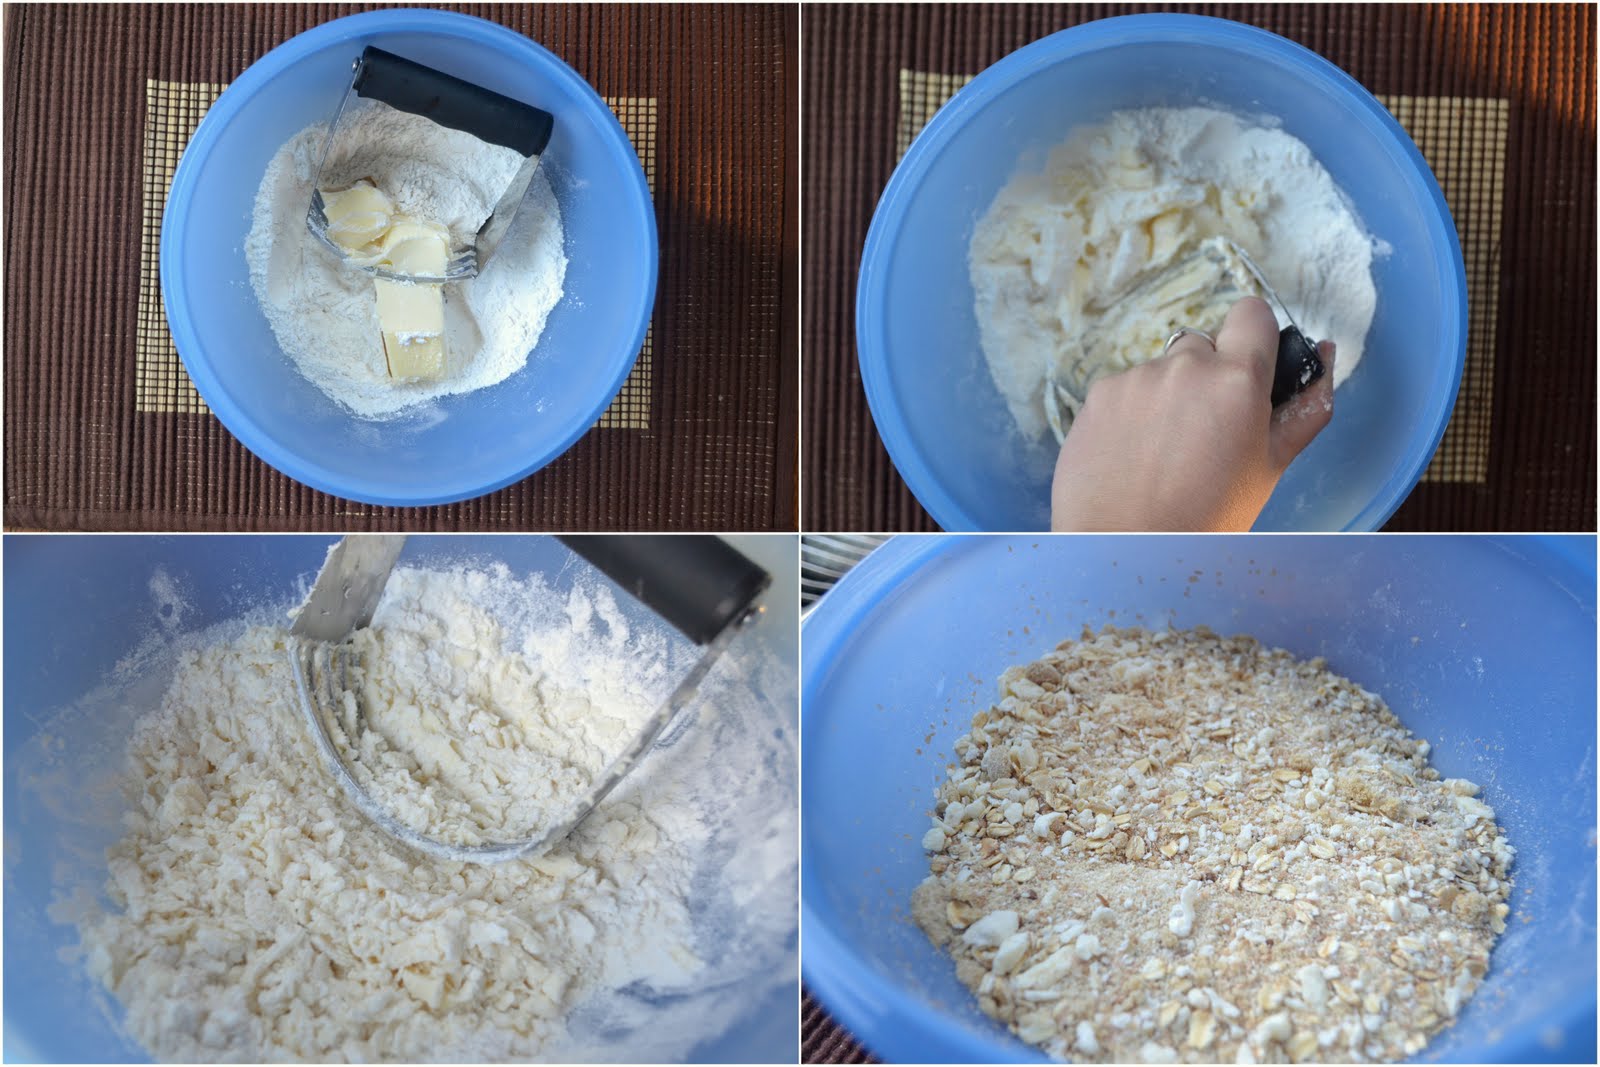
Then, cut in butter until coarse crumbs form, then mix in the brown sugar and oats.

Pour the mixture over top, and it's ready for the oven!

I hope you've enjoyed this summer-inspired dessert post!
What are your favorite flavor combos in crisps?
ps: kelsey ♥
This recipe is so ridiculously easy...and SO GOOD!
It's definitely something I would recommend to beginner bakers....as well as anyone looking for an easy dessert to whip up!
My family absolutely loves making this in Summer, and we even grow rhubarb (as well as a multitude of berries) on our farm. Having fresh fruit available all summer is so wonderful...and we often mix up what kind of fruit we use in this tasty dessert as well.
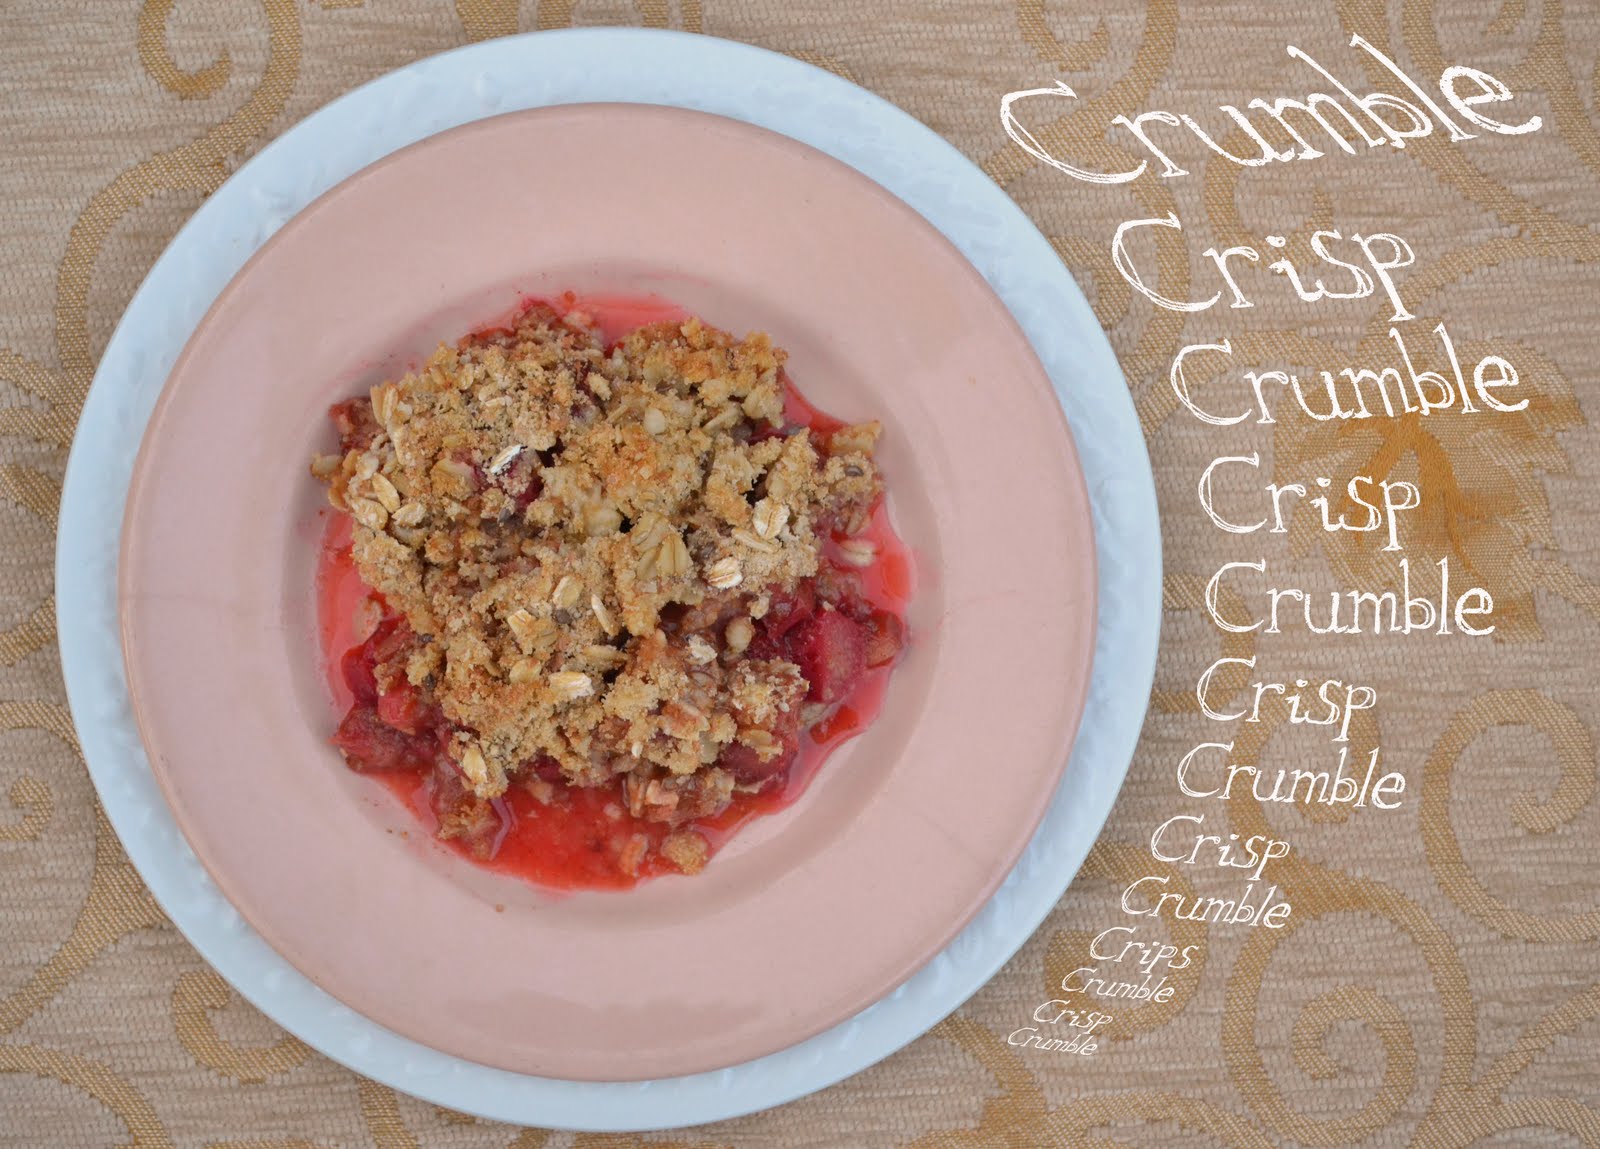
Strawberry-Rhubarb Crisp
recipe by: Jordyn!
Ingredients:
6-8 cups of chopped rhubarb (depending on how much fruit you like in your Crisp...we love having a ton of fruit in ours!)
2-4 cups of sliced strawberries (raspberries are also an excellent substitute)
2/3 cup Sugar
1 tsp Cinnamon
3/4 cup Flour
1 1/2 tsp Baking Powder
Pinch of Salt
Pinch of Salt
1/3 cup Butter (cold)
1 cup Brown Sugar
1 cup rolled quick cooking Oats
Directions:
Fruit Layer:
1) In a greased 9x13 glass pan, mix together the rhubarb and strawberries.
2) In a small bowl, mix together sugar and cinnamon; then sprinkle over top of fruit.
Crumb Topping Layer:
1) In a medium bowl, mix together the flour and baking powder.
2) Then, cut in cold butter with a pastry cutter or a fork until the mixture resembles coarse crumbs.
3) Stir in brown sugar and oats.
4) Sprinkle crumbs over fruit evenly.
Bake at 350 degrees for 40-50 minutes, or until the top is lightly browned and the fruit is tender.
Nice and easy. Stir your fruit together in the pan, and then sprinkle with cinnamon and sugar.
Then, cut in butter until coarse crumbs form, then mix in the brown sugar and oats.
Pour the mixture over top, and it's ready for the oven!
One of the best ways to enjoy this dessert is by adding ice cream!
I hope you've enjoyed this summer-inspired dessert post!
What are your favorite flavor combos in crisps?
ps: kelsey ♥
 We had a 19-hour layover in London on the way to Africa, so Caleb & I hit up some sights =)
 Had a short layover in Zurich then after being in transit for over 24 hours, we finally reached our final destination: Nairobi, Africa!!
  Led a bible study at an orphanage in Nairobi with the most wonderful kids!
  Befriended this precious little girl & her baby brother in the small village of Korr in Northern Kenya...
  Hung out with some Rendille women in the village... aren't they gorgeous?! (& my sincere apologies for the partial nudity, but in northern Kenya, it's really inevitable...)
 We straddled the Tanzanian - Kenyan border & were in two places at one time,
 Went on an African Safari & saw TONS of cats... including a pride of 20 lions, 2 cheetahs, and even 2 leopards (which are one of the rarest animals to see on a safari!)
 Not only did we see a crazy amount of animals, we also ate a few interesting ones on an adventurous dinner date. Our menu included: ostrich, crocodile, and ox testicles...yes, you read correctly. I ate ox testicles like they do in Fear Factor episodes... & I would definitely NOT recommend them to you ever.
 Then we said goodbye to Kenya and spent a couple days in Zurich, Switzerland! (can you make out the alps in the distance? they were GORGEOUS)